
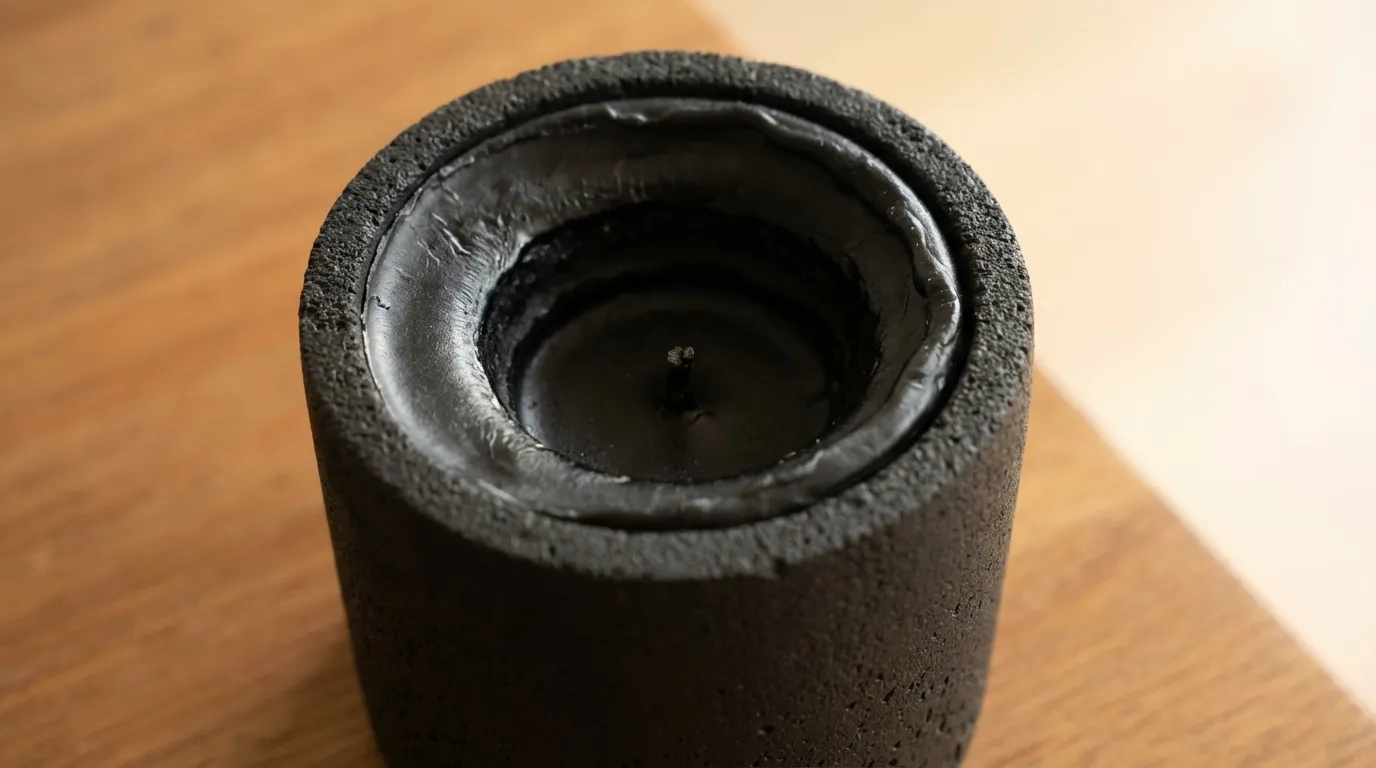
You have seen it. Maybe you have caused it. A candle that has burned a narrow well straight down the center, leaving a thick ring of untouched wax clinging to the vessel walls like a geological formation. The flame sits in a little crater of its own making, barely visible, throwing almost no scent, wasting half the product you paid for.
This is tunneling. It is the most common candle problem, the most preventable, and, if caught early enough, the most fixable.
Why Tunneling Happens
Soy wax has memory. This is not a metaphor. The melt pool you create during a burn session establishes a physical pattern that the wax will follow in subsequent burns. If the melt pool reaches the full width of the vessel, the next burn will melt outward to the same diameter. If the melt pool is narrow, the next burn will track that narrow channel.
Tunneling almost always starts with the first burn. Light a new candle, burn it for forty-five minutes, blow it out, and you have just programmed the wax to burn in a column the diameter of that initial melt pool. Every subsequent burn deepens the tunnel rather than widening it.
The wick cannot fix this. Even a properly sized wick does not generate enough heat to melt through the solid wall of wax that forms around a tunnel. Once the pattern is set, the candle is locked into it.
Prevention: The First Burn Rule
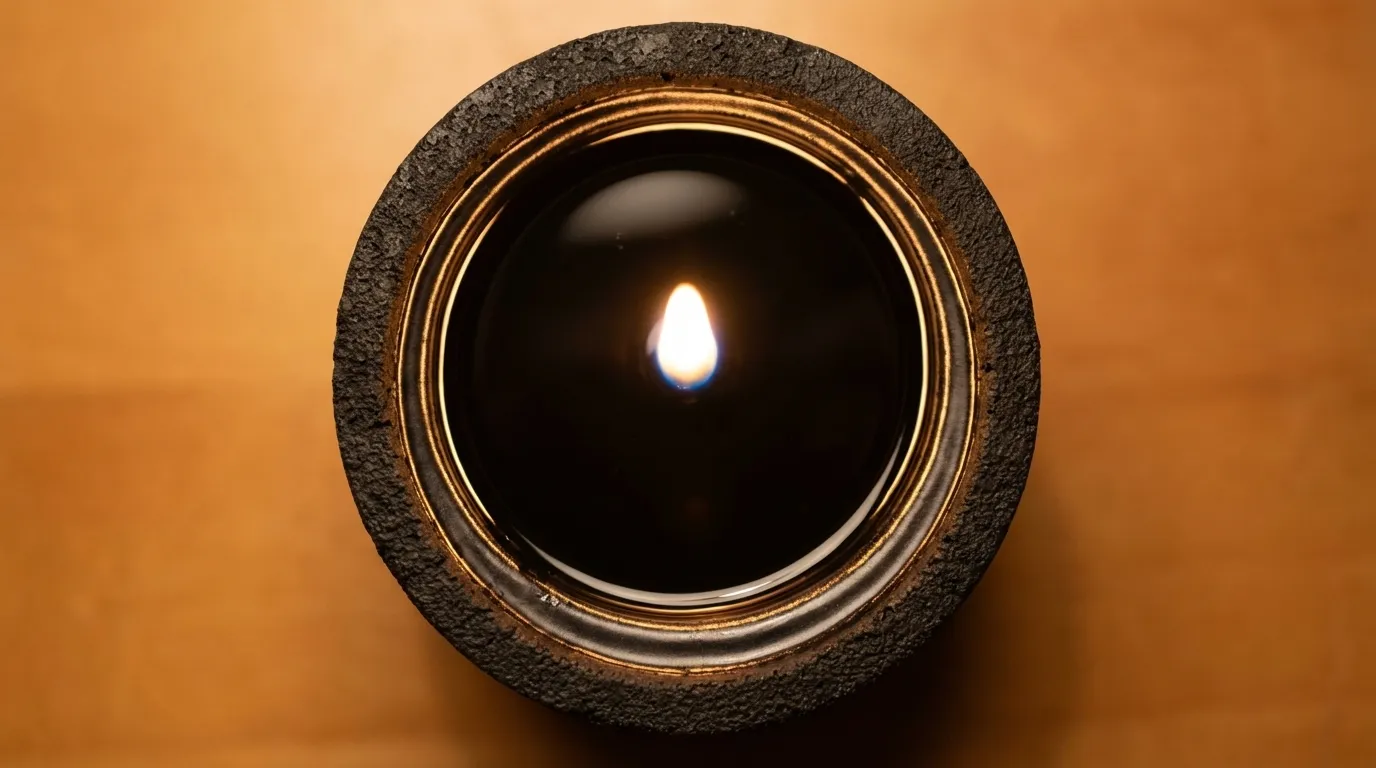
The prevention is simple and absolute. The first time you light a new candle, let it burn until the entire top surface has melted into a complete, edge-to-edge liquid pool. No solid wax remaining at the perimeter. Full coverage.
For a standard-sized candle, about three to four inches in diameter, this takes between two and three hours. For larger vessels, up to four hours.
This is not optional. It is not a suggestion for optimal performance. It is the single most important thing you will ever do with a candle. Get the first burn right and every subsequent burn will follow the established pattern, melting evenly to the walls of the vessel every time.
Many candle makers include this instruction on their packaging. Most people do not read it. Those who do read it often think thirty minutes is close enough. It is not.
The prevention rules are gathered on Lyra's care page if you want them in one place. For the habits that add hours across the life of a candle rather than rescuing one, see candle burn time tips.
The Fix: Foil Method
If tunneling has already occurred, the situation is not hopeless. The foil method works if the tunnel is not too deep.
Take a piece of aluminum foil and create a dome over the top of the candle, leaving a small opening at the center for the flame to breathe. The foil reflects heat downward and inward, raising the temperature of the solid wax around the tunnel enough to melt it.
Light the candle, place the foil dome, and check it every twenty minutes. The goal is a full, even melt pool. Once achieved, remove the foil and let the candle burn normally for another hour to reinforce the correct pattern.
This method works best when the tunnel is less than an inch deep. Beyond that, the wick may not be tall enough to generate sufficient heat even with the foil assist.
The Fix: Heat Gun Method
For deeper tunnels, a heat gun is more effective than foil. Hold the heat gun six to eight inches above the candle surface and move it in slow circles, melting the raised wax around the edges until the surface is level. Then light the candle and establish a full melt pool.
A hair dryer on its highest heat setting can substitute in a pinch, though it takes longer and may blow melted wax around if held too close.
The heat gun method does not require the candle to be lit during the leveling phase. Melt the surface, let it cool slightly until it is liquid but not sloshing, then light the wick. The even surface gives the flame a fresh start.
When to Walk Away
Some tunneled candles are not worth saving. If the tunnel has burned so deep that the wick is submerged below the wax rim, or if the wax wall is more than an inch thick, the candle has passed the point of practical rescue. You can try the heat methods, but the effort and risk of spilling hot wax may exceed the value of the remaining fragrance.
In these cases, the wax is not entirely wasted. You can scoop it out and use it in a wax warmer, where it will release its fragrance without needing to burn at all. The vessel can be cleaned with warm water and repurposed.
Other Burn Habits That Matter
Tunneling is the biggest preventable problem, but not the only one. A few additional habits keep your candle performing well.
Trim the wick before every burn. One quarter inch. This maintains a proper flame height and prevents the mushrooming carbon buildup that causes flickering and soot.
Burn for no more than four hours at a time. Extended burns overheat the wax, diminish fragrance throw, and can cause the wick to shift or become unstable.
Keep the candle away from drafts. Moving air pushes the flame to one side, causing uneven melting on the downwind edge. The result is a lopsided melt pool that can evolve into diagonal tunneling.
Place the candle on a level surface. A tilted candle produces a tilted melt pool. Over time, this creates uneven wax consumption and can cause the flame to lean against the vessel wall.
Respecting the Object
Candle care sounds fussy until you consider what you are protecting. A well-made candle is a designed object with a finite lifespan. The manufacturer calibrated the wick, the wax, the vessel, and the fragrance to work together in a specific way. When you burn the candle correctly, you are honoring that calibration.
When you burn it carelessly, you are paying for forty hours and getting twenty. That is not a candle problem. It is an information problem. And now you have the information.
Lyra's 01 Andromeda is designed for a clean, full melt pool from the first burn. 40 hours of even, honest performance. lyracalifornia.com.